How to Use DaDesktop as a Participant
Objective
This guide is designed for participants (students) who plan to attend a course powered by DaDesktop.
DaDesktop at a Glance
DaDesktop is a cloud-based training environment built specifically for IT education. It connects instructors and learners through virtual desktops driven by the groundbreaking DaDesktop® technology. Each participant gets a full online desktop where they can perform hands-on exercises while the trainer keeps an eye on progress.
The platform consists of three main components:
- Management Console -- a web interface for system administration, such as starting or stopping cloud desktops.
- Training Room -- a collaborative space for desktop sharing, audio, chat, recording sessions, and more.
-
Remote Desktop -- a virtual machine (Windows or Linux); one machine is provided per user.
What You’ll Need
If you want to join from your office or from your home in Indonesia, here’s what you’ll need:
- A computer (PC or laptop) with a reliable internet connection (minimum 10 Mbit/s download and 1 Mbit/s upload). Both Windows, Mac, and Linux machines are fine.
- Chrome or Firefox web browser
- A decent microphone or headset (using a telephone is a last resort and not recommended)
-
A quiet spot, free from distractions and background noise (a coffee shop won’t do)
Also recommended:
- Webcam
- A second monitor; you can watch the instructor on one screen and use your DaDesktop virtual machine for labs on the other.
- Turn off any VPN before the course begins
- Disable any security software that might interfere with the network connection if possible
- Use an Ethernet connection when you can; if you’re on Wi-Fi, test your speed beforehand with a site like speedtest.net
You might want to log in before the course starts to test out your DaDesktop virtual classroom. Keep in mind that outside of course days, desktop access is limited to 15‑minute windows.
Accessing the Course
Note that when the course isn’t in session, access to your course is restricted to a 15‑minute window.
On course days, you can access it all day long. Previously, entry was only permitted an hour or so before the training.
Keeping Your Desktop After the Course
A great benefit of using DaDesktop is that participants can keep using their virtual machine after the course ends.
Full details on how to do this can be found at the link above.
Joining a Course
Open the link provided by your coordinator (for example, dd4t.dadesktop.com/da/join/xxxxx).

Image 01
If you’re a first-time user, fill in your details under “Account” and click “Sign Up”. You can register using the form or by signing in with Google or LinkedIn.
If you already have an account, just log in.
You’ll arrive at the Management Console for your course.

Image 02
Working with the Management Console
Click the “TRAINING ROOM” tab.
Then click the “Join Training Room” button.

Image 03
The Virtual Training Room will open in a new browser tab. A pop-up will ask for permission to allow items to be copied to the clipboard. Click “Allow”.

Image 04
Navigating the Training Room as a Participant
The Training Room appears with a tab at the top that provides links back to the course.

Image 05
Controls at the bottom of the screen
- You can ‘pop out’ the screen to another monitor, and the browser window can be maximized.
- A small blue toggle at the bottom right opens the DaDesktop support chat if you need it.
Using the New Clipboard Feature
 We use the Clipboard to transfer text – like web links, functions, etc. – from your own computer into the virtual machine.
When you connect to your online course or stand-alone desktop, a pop-up like the one shown will appear. Click ‘Allow’. Note that images cannot currently be copied via the clipboard.
Image 06
 If you click the small clipboard icon on the address bar, you can change the site’s clipboard settings.
How to Use It
- On a Windows or Linux VM, copy and paste as you normally would on your PC (Ctrl‑C and Ctrl‑V).
- On a Mac, copy as usual and then press Shift + Ctrl + V or middle‑click the mouse to paste.
Image 07
Please get in touch with us if you need further help with this feature.
Original Clipboard (only for browsers that don’t support the new Clipboard, like IE, or as a fallback)
- To copy text between your machine and the DaDesktop virtual machine, type or paste into the clipboard area at the bottom left of the screen.
-
On the virtual machine, click the middle mouse button (or scroll wheel) to paste the clipboard contents onto the desktop. This works anywhere in DaDesktop where text can be entered, assuming you’re using the standard Linux virtual machine.
Mac users – use Command c (⌘ c) to copy and Command v (⌘ v) to paste. Once pasted into the dd4t clipboard, inside dd4t the shortcuts become Control X, Control C, and Control V for cut, copy, and paste. - If you’re using the Windows virtual machine, right‑click to paste from the clipboard.
To resize the clipboard area, click the green‑and‑white arrow icon at the bottom left of the screen.
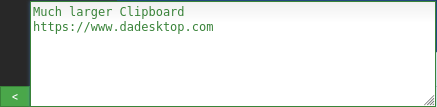

Image 08
Mouse Behavior in Multi‑User Environments
A new feature shows the username of the person controlling the mouse cursor when more than one user connects to the same desktop. This is especially handy during training activities where different people may take turns using the mouse.

Image 09
If more than one user is connected, their usernames are displayed at the bottom centre of the screen.

Image 10
You can enable or disable this feature by clicking the green ‘Info’ button at the bottom of the screen.